Material Config Editor
The Material Config Editor lets you easily create and edit material configs from within the game and even display changes in real time.
It's primary use is to speed up and simplify the creation of custom units for levels, however in theory it can also be used to edit stuff like characters or weapons.
Access The Editor
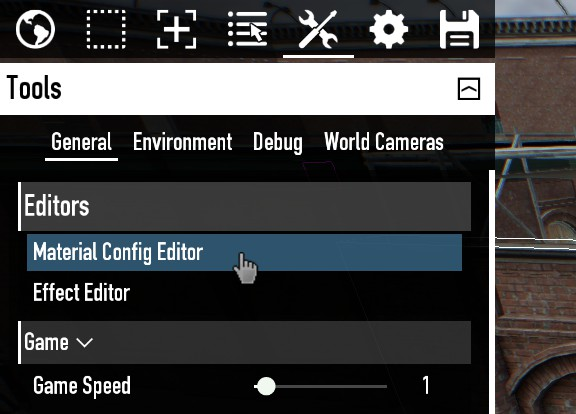
You can find it by navigating to the "Tools" menu and the "General" tab, it will be listed at the very top in the Editors section.
Alternatively you can select any unit and press the new "Edit Material Config" button in the Quick Actions section. This works with any unit and will automatically open up the correct material_config file of the unit.

Navigation
File
New Material Config
Lets you create an entirely new material config.
Open From File
Opens up the file browser and lets you search for any .material_config file on your computer.
Open From Database
Lets you open any base-game material config by loading it from database.
Open From Selection
Opens up the material config form the currently selected unit.
Save
Saves the currently opened material config. Only works with custom material_config files, saving a base-game config will instead save it as a completely new file and the original material config will not be affected.
Save As
Opens up the file browser and lets you save your material config as a new file, or override an already existing one.
Close
Closes your currently opened material config. Any unsaved changes will be lost.
Exit
Exits the editor and closes all currently opened material configs. Any unsaved changes will be lost.
Edit
Lets you undo and redo actions. Pretty self explanatory.
Tools
Reload Material Config
Manually updates the unit in your level with the changes you made in the config. Usually not needed when using Real Time Feedback.
Real Time Feedback
Automatically updates the unit in your level when making changes in your config.
Show XML Output
Shows the raw XML of your config file.
Help
Problem Solver
The solution to all your problems.
Material Configs
Shows the name of the material config you're currently editing.
Use the 2 arrow buttons on the right to switch between other opened config files.
Editing
Managing your materials
Once a material config file has been opened, it will show you a list with every available material from the config.
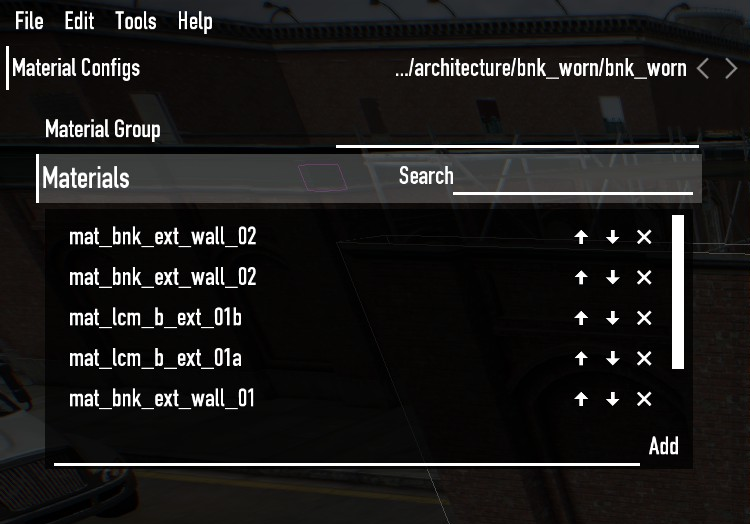
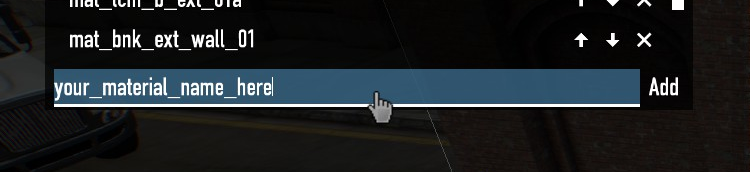
You can add a new material to the list by typing it into the text box at the buttom and clicking "Add".
Use the arrow buttons to move the materials up or down in the list, this is purely for organization.
The "x" button deletes the material from the config.

To edit a material simply click on it in the list.
When selected you can rename it or copy/paste it to other materials.

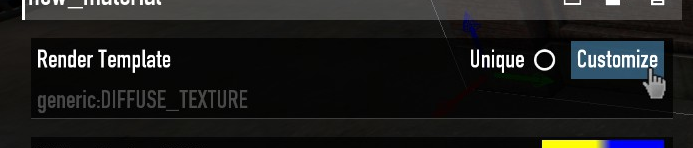
Render Template
Change your render template by clicking the customize button on the right.
We as modders can not actually add any custom render templates so we have to rely on the already existing ones. Luckily there are a lot, pretty much for any situation there is a render template.
Start by choosing the shader you need in the dropdown.
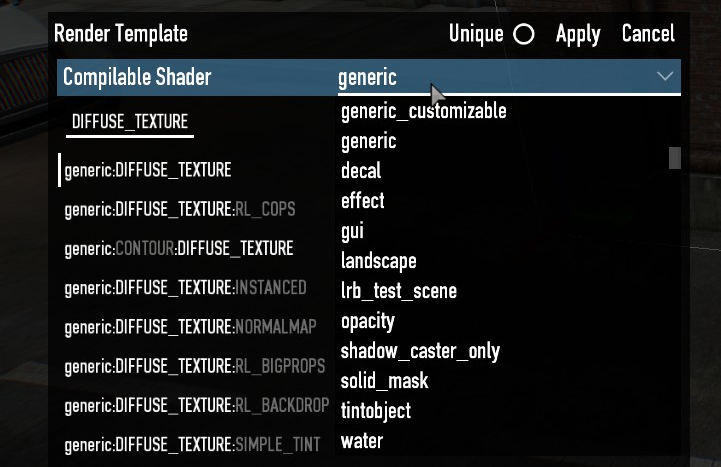
From there you can either scroll the list of render templates, or search below for a specific shader define you need.
Click the dropdown below to open a list if every shader define.
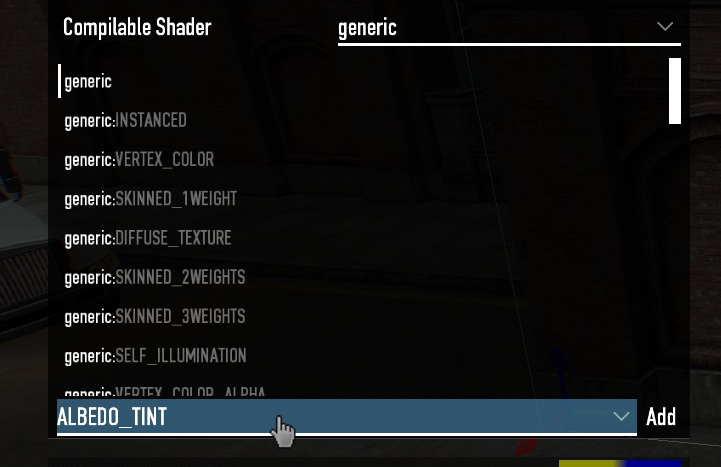
At the top you can search for the exact define you need. (Keep in mind that the searchbar is case sensitive and requires you to type in all caps to work correctly.)
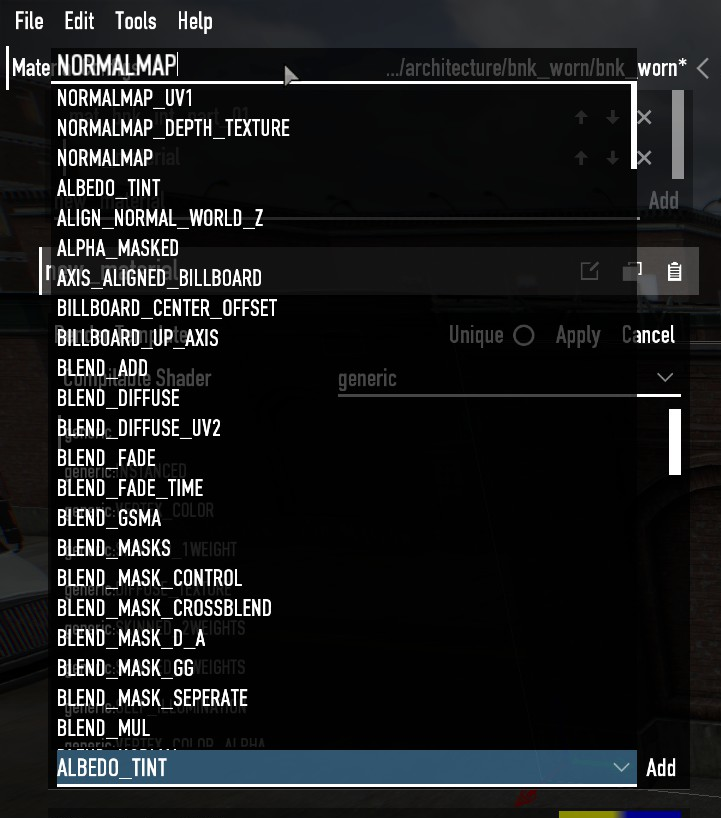
Now click on the define to select it and then "Add" to add it to your template.
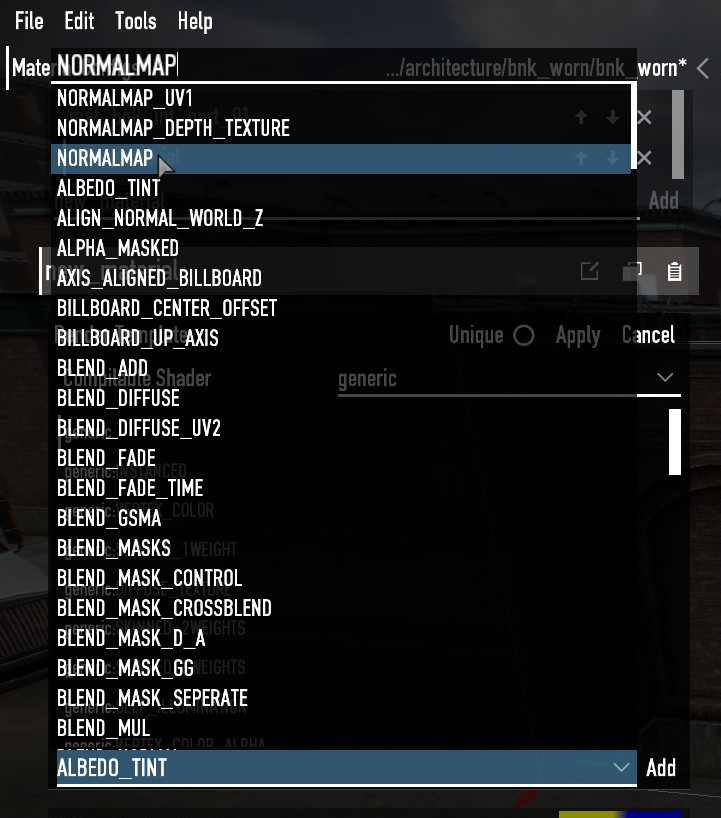
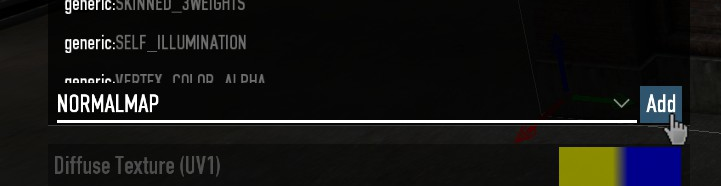
It will now appear as a button below the Compilable Shader and can be clicked to be removed again.
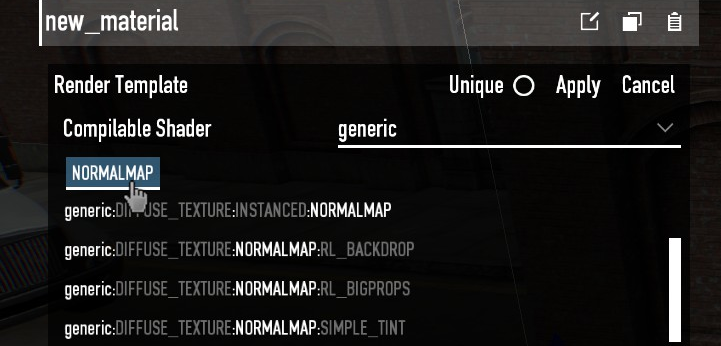
As mentioned earlier, we have to use pre-defined render templates, the editor automatically filters and highlights the templates based on the defines you selected.
Repeat this process until you find the render template you need and click it to select it, it will automatically match the define buttons to the template.

When you're done, click "Apply" to apply the template to your material. You can then edit the parameters and values of the template.
From here on everything should be self explanatory, but if needed this will be extended.
No comments to display
No comments to display