Elements - Scripting Your Level
To make your level actually work, you place what’s called “Elements”. They are what most of the level logic consists of. You can compare it to programming, but very much simplified, or visual scripting in other game engines, just directly inside the level itself.
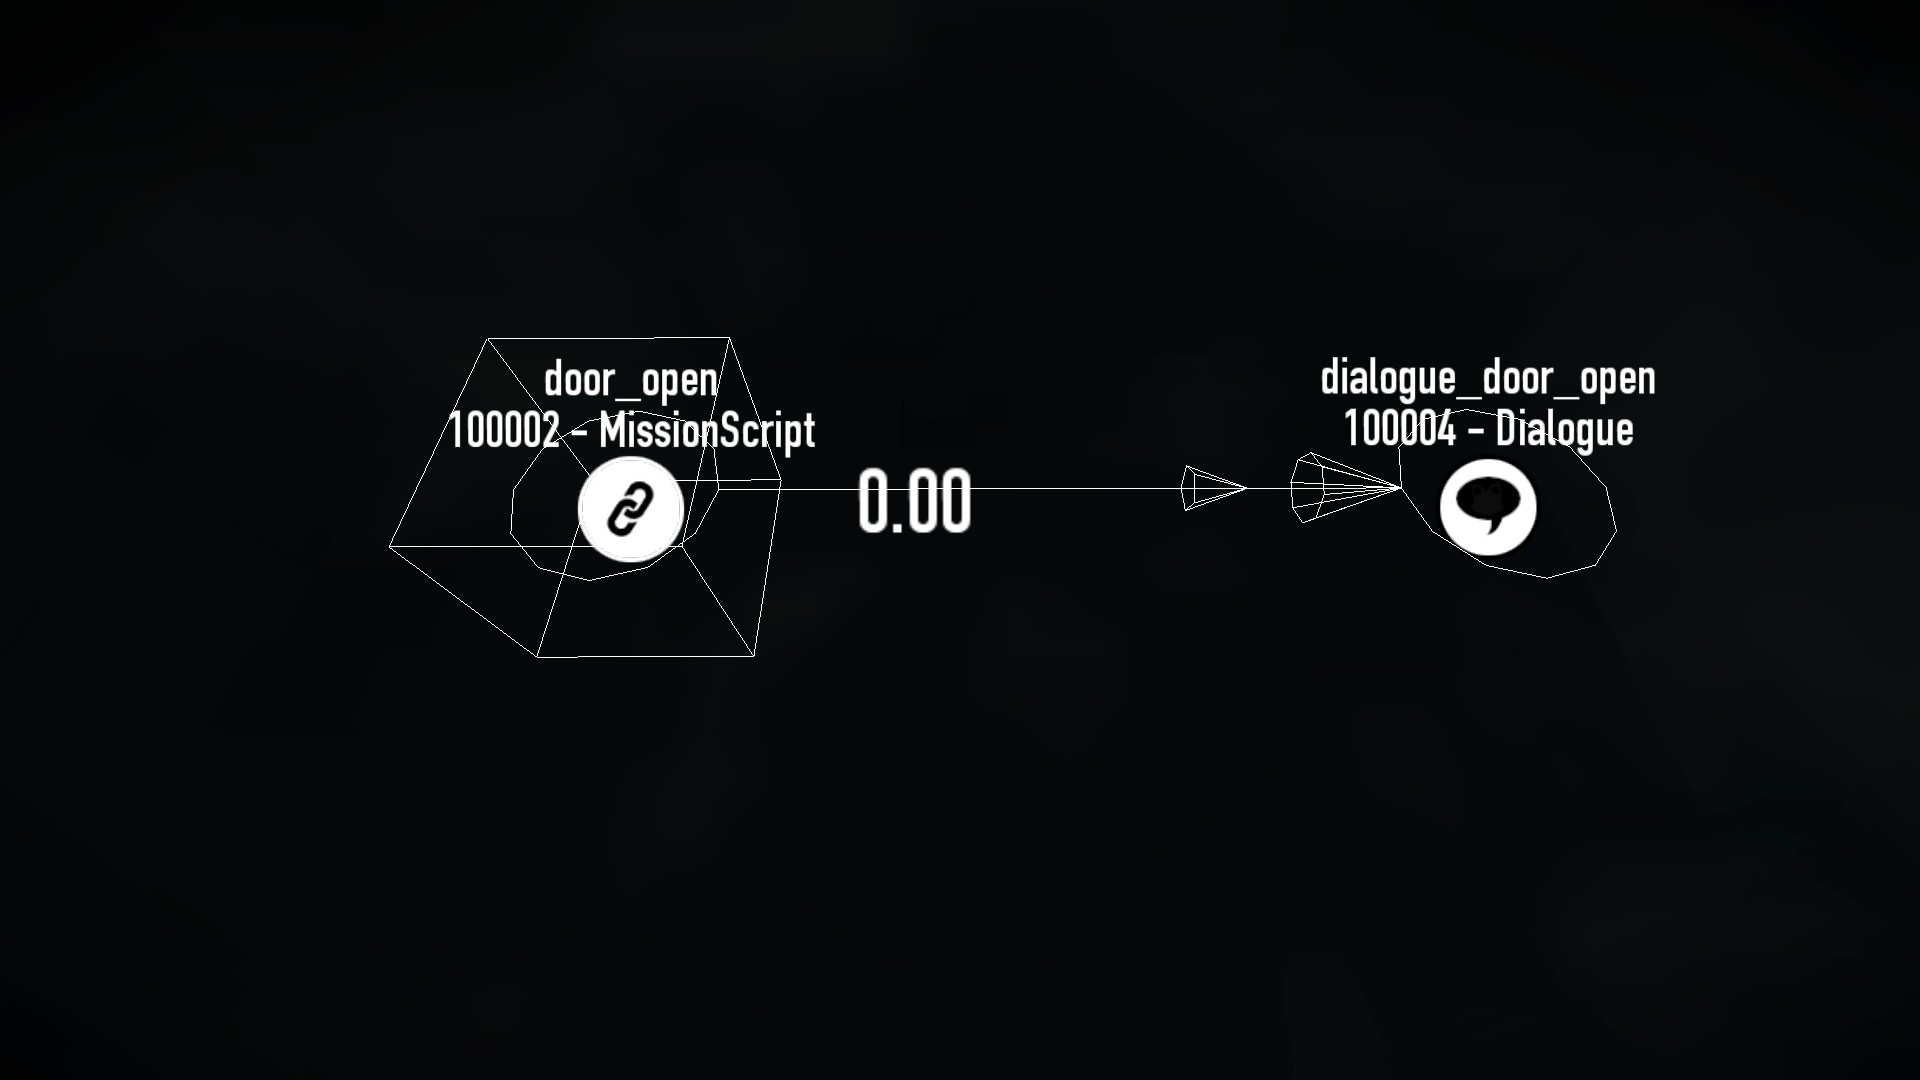
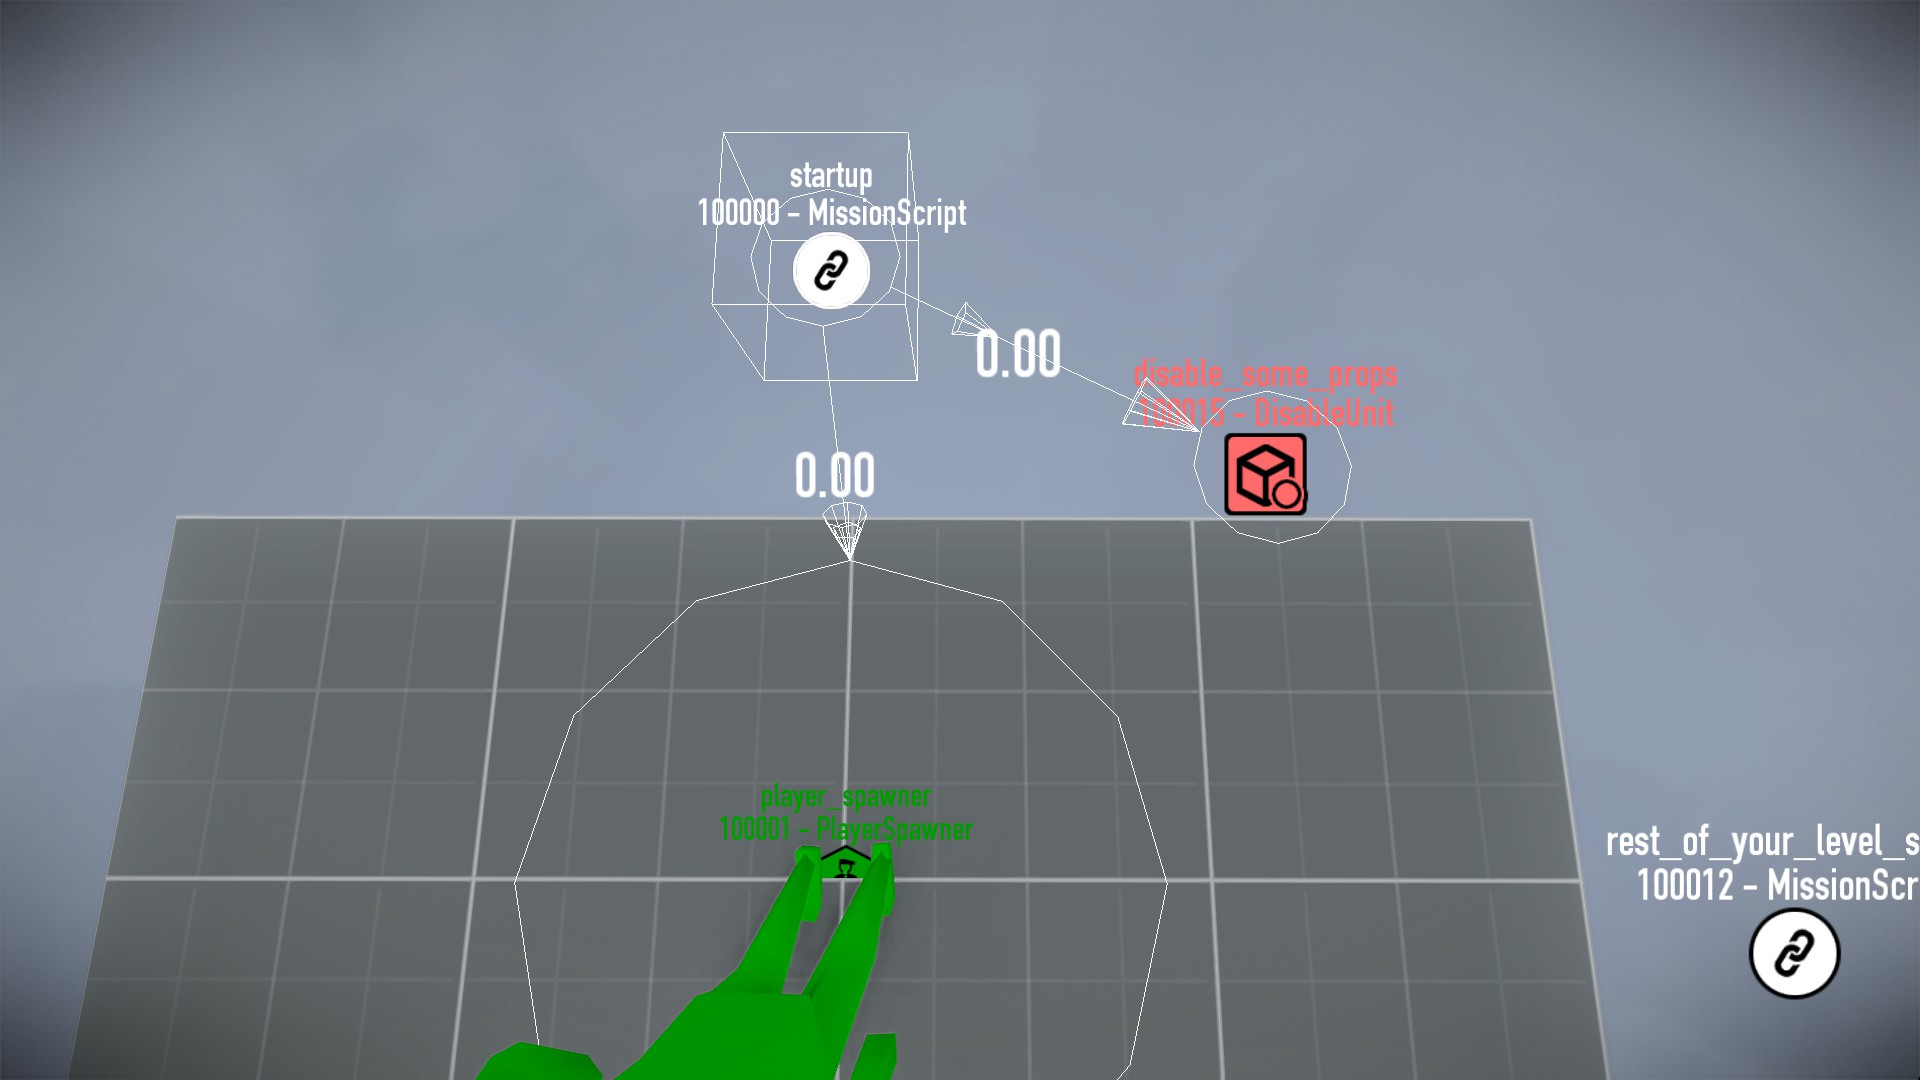
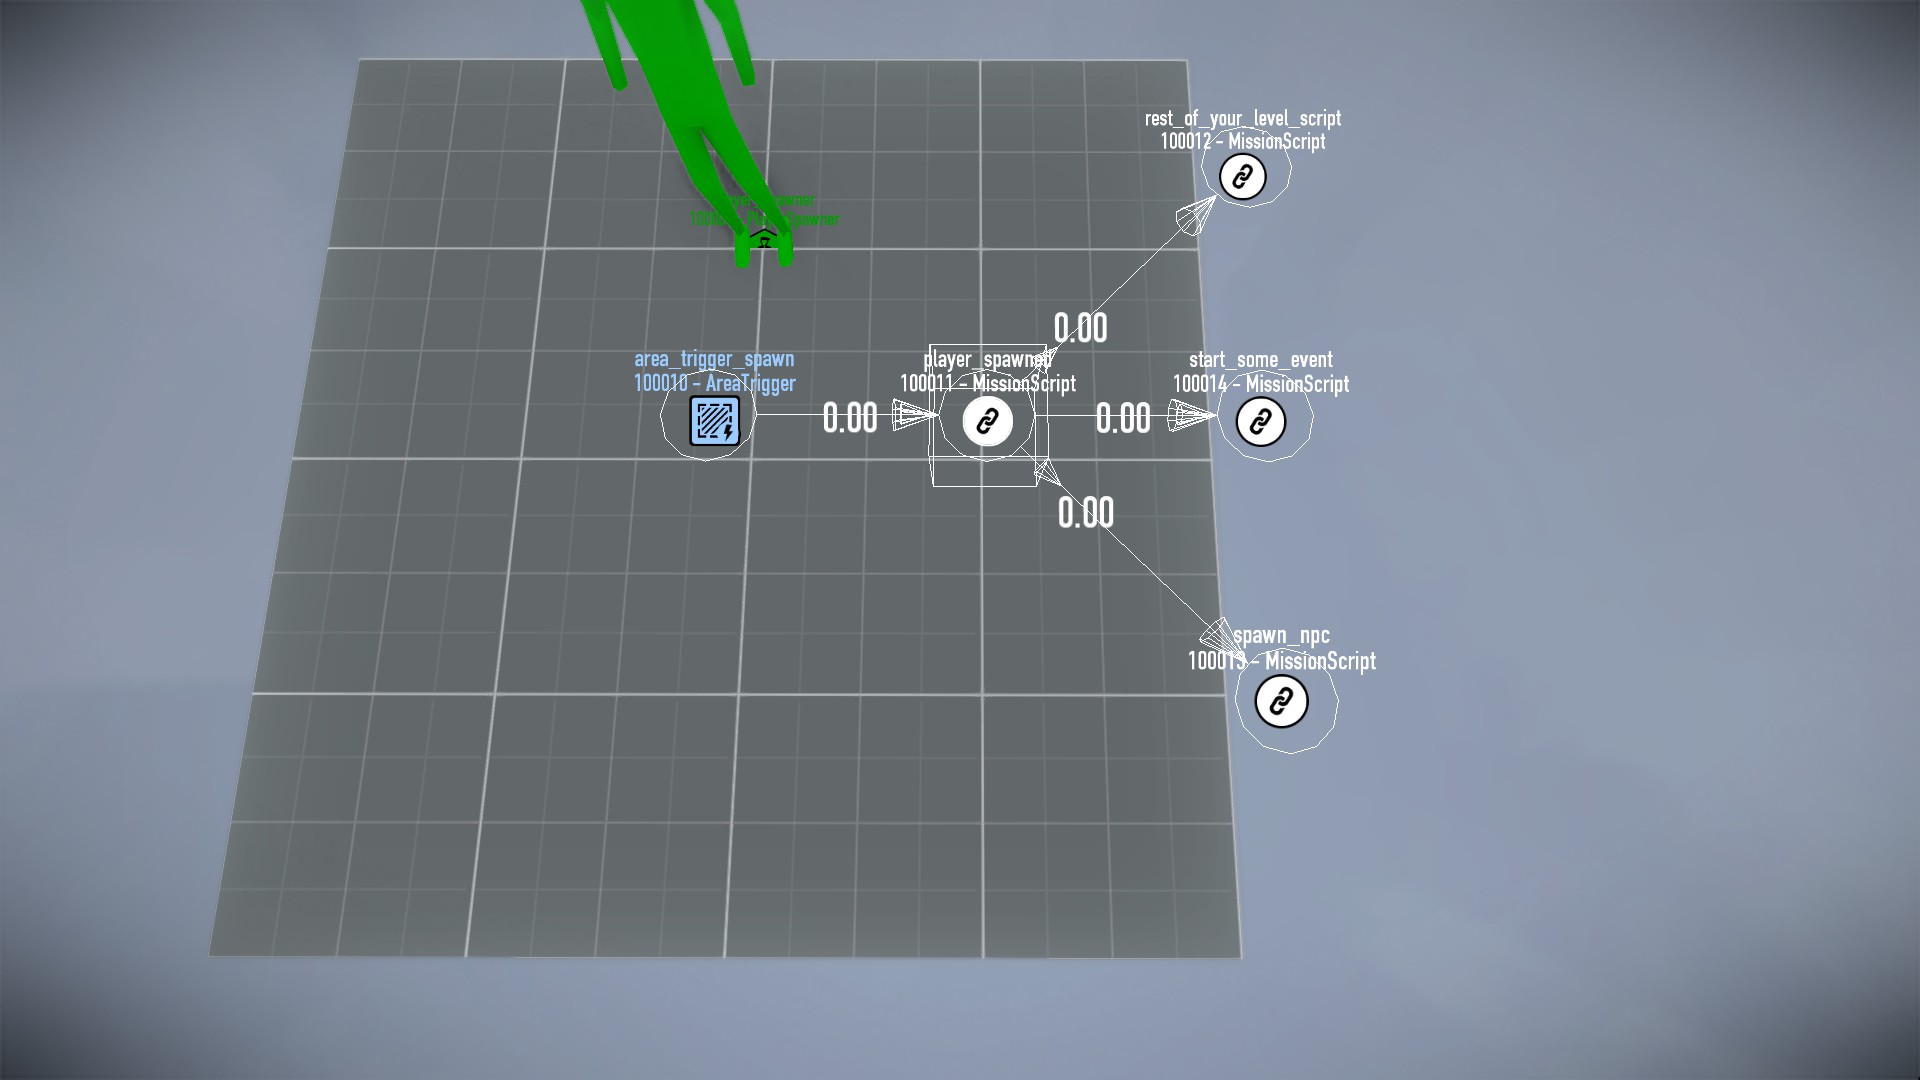
To script your level, you connect Elements together. Triggering the script with a Trigger element will then execute their task and execute the next Element in the chain.
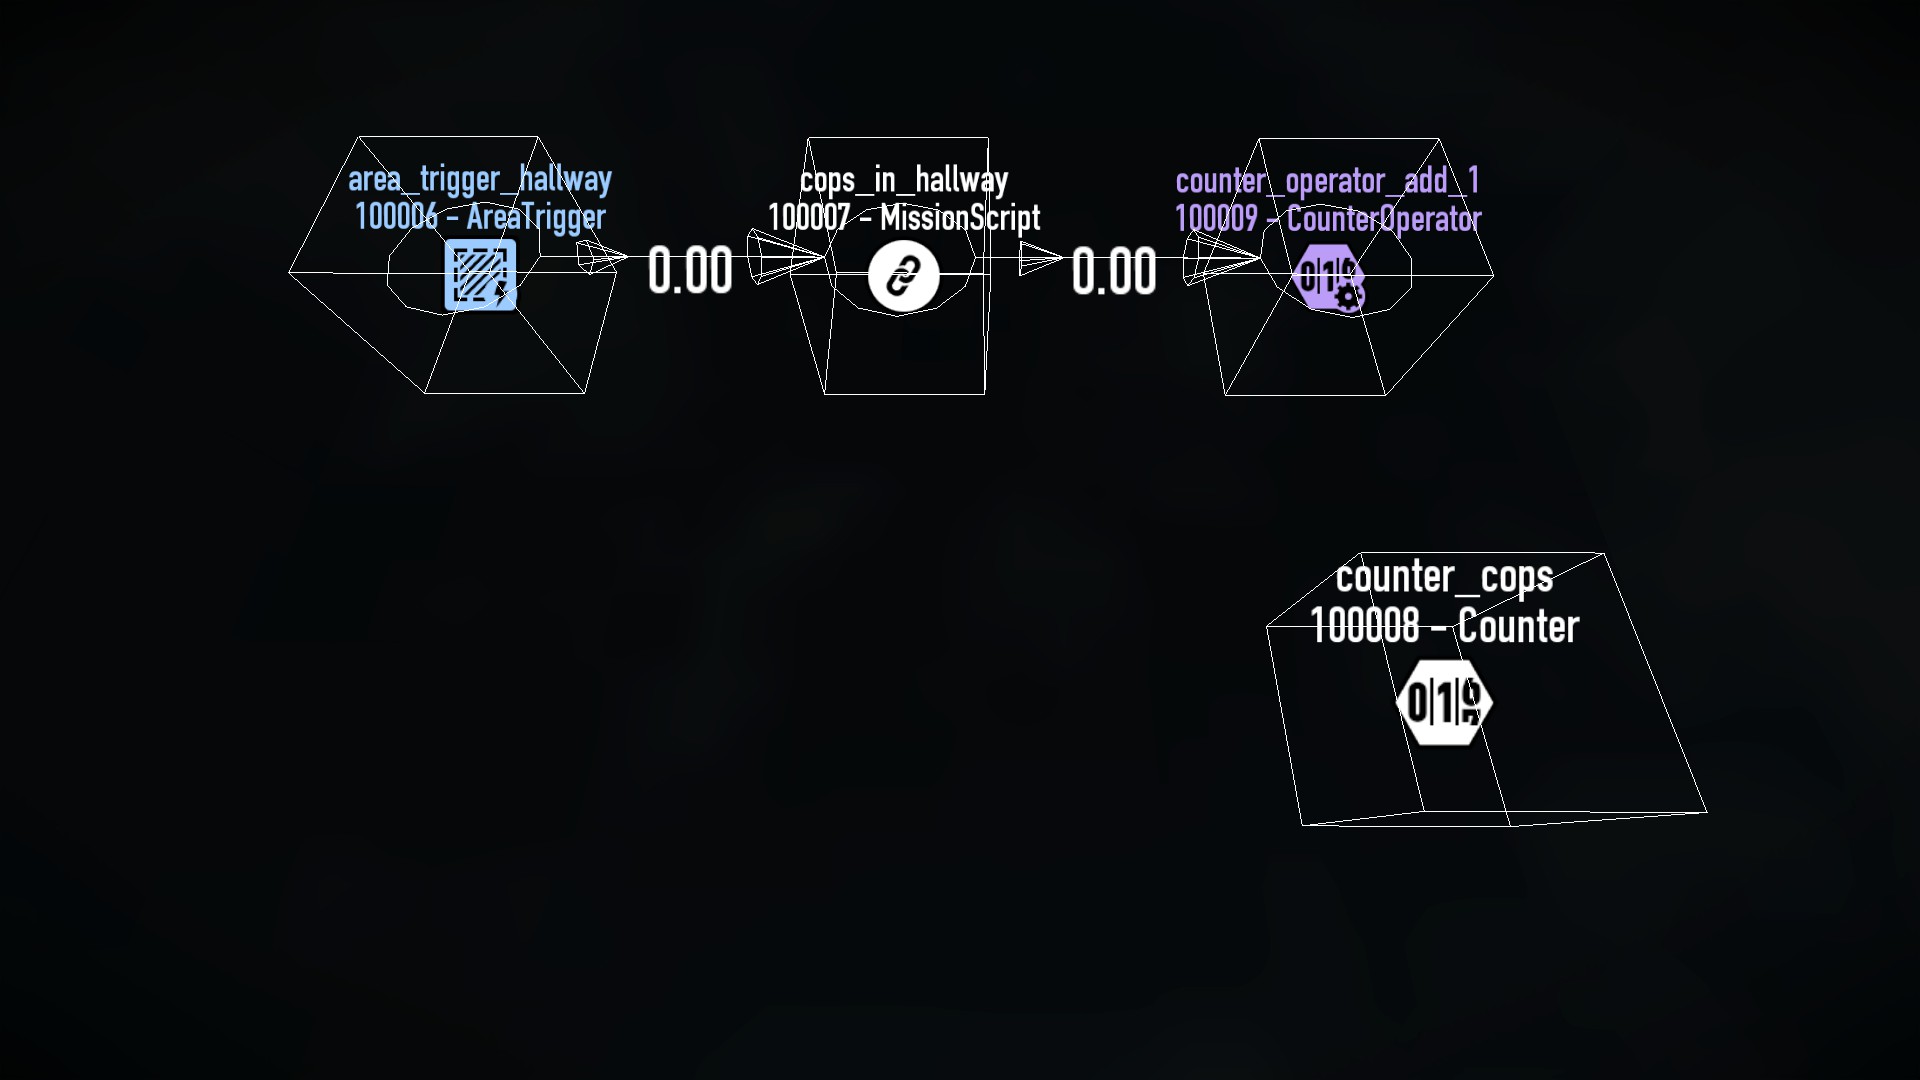 [Example: AreaTrigger triggers when cops enter its area, executes a chain of elements adding 1 to the counter]
There are a lot of different Elements, each with their own functionality and tasks. Most of the names already give you a good summary of what they can do, but you can always click the little question mark icon on the top to open the Wiki page with more detailed information.
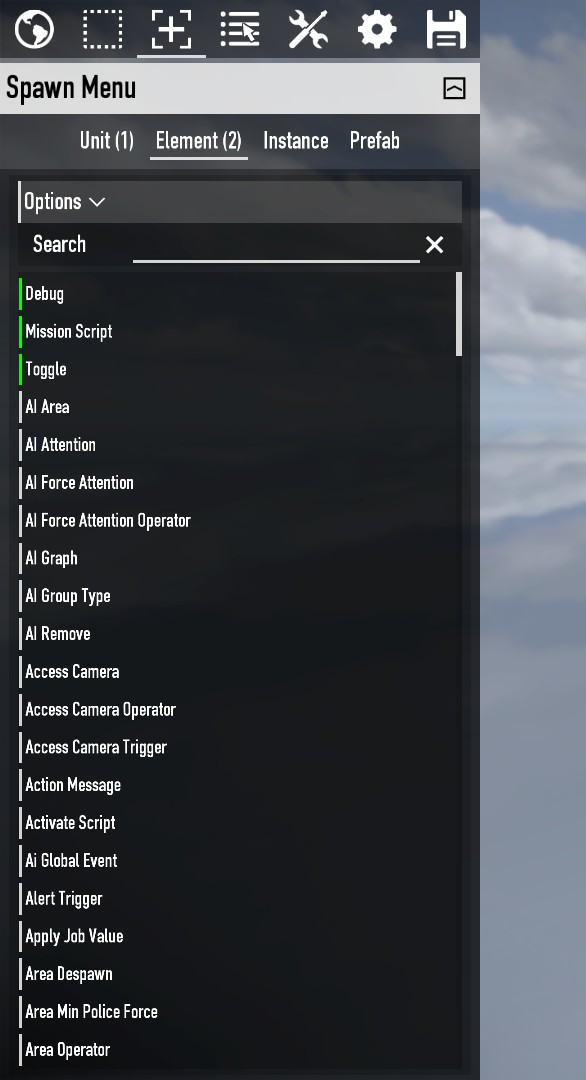
Spawning
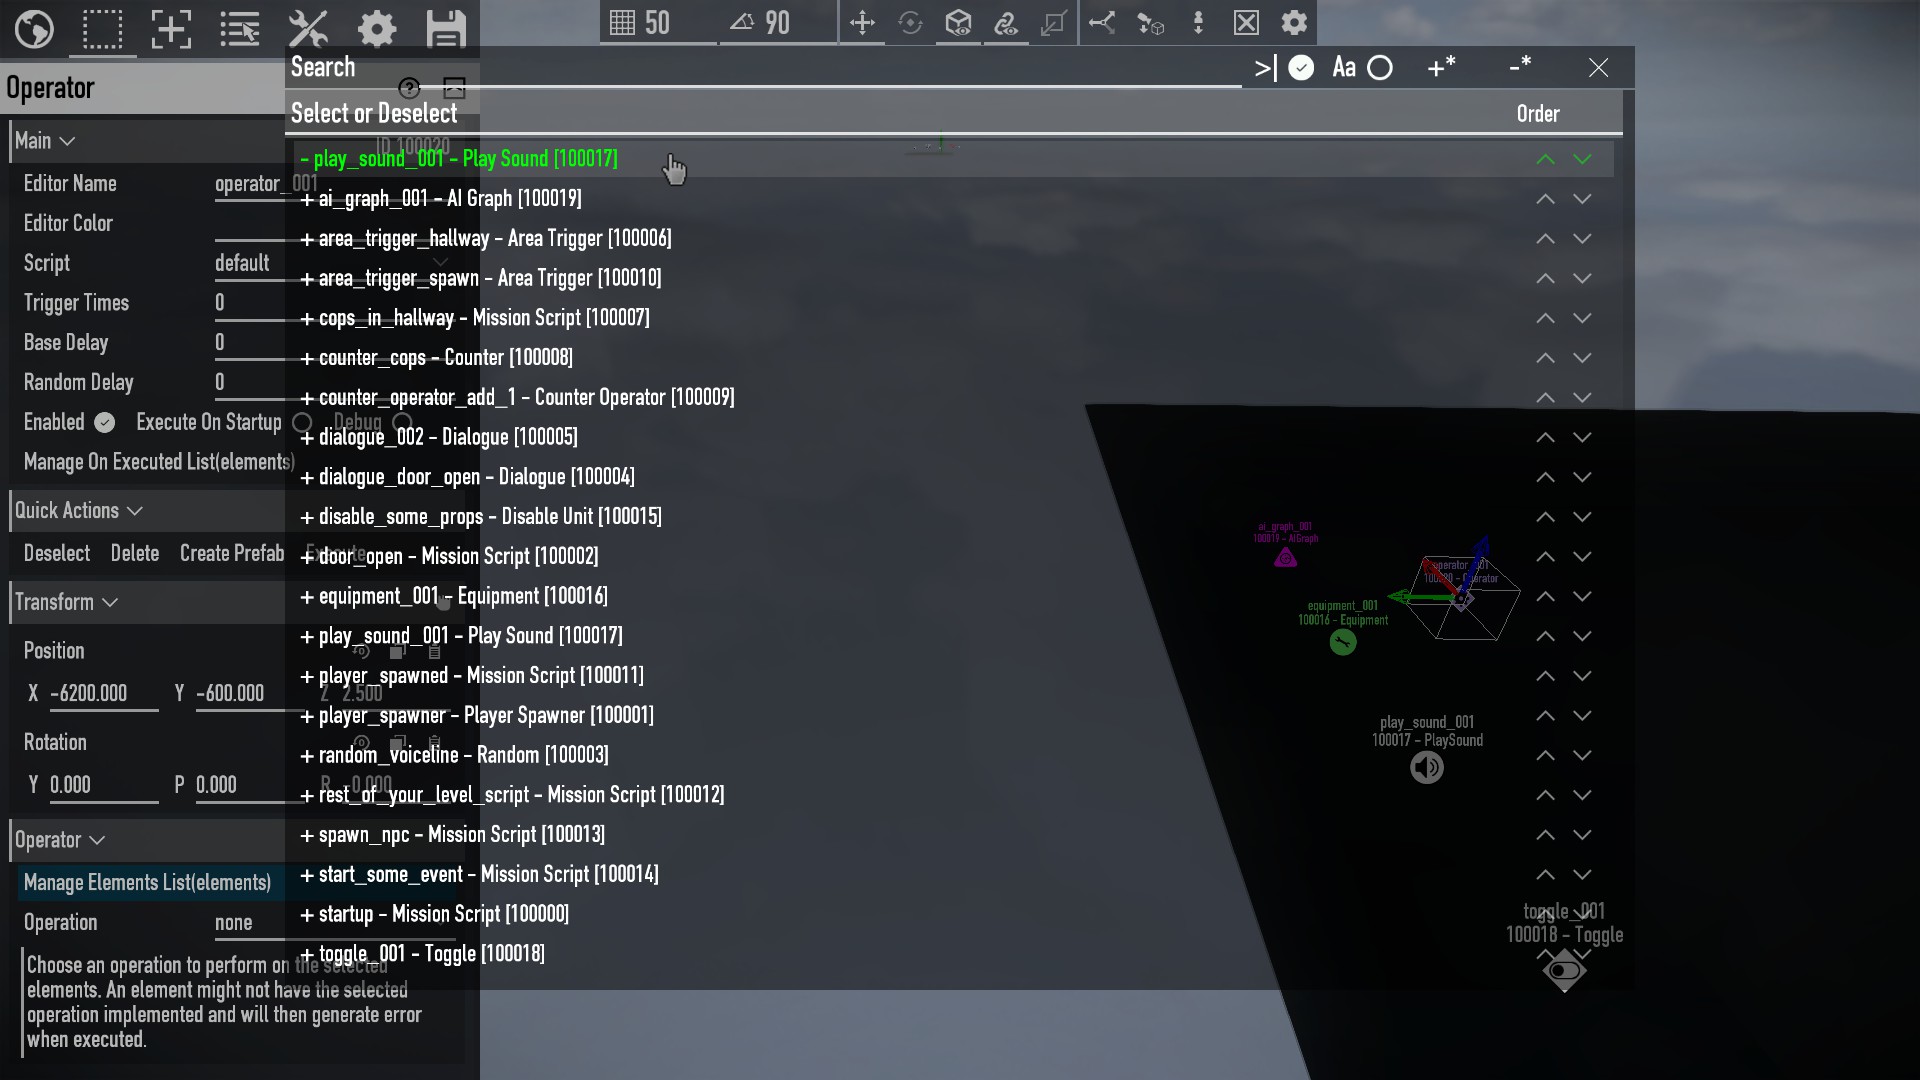
You start by navigating to the Spawn Menu and to the “Element” tab. You can scroll down or use the search bar to look for the type of element you need and click on it to spawn it into your level.
You can move and rotate them how you like to keep them organized.

Settings
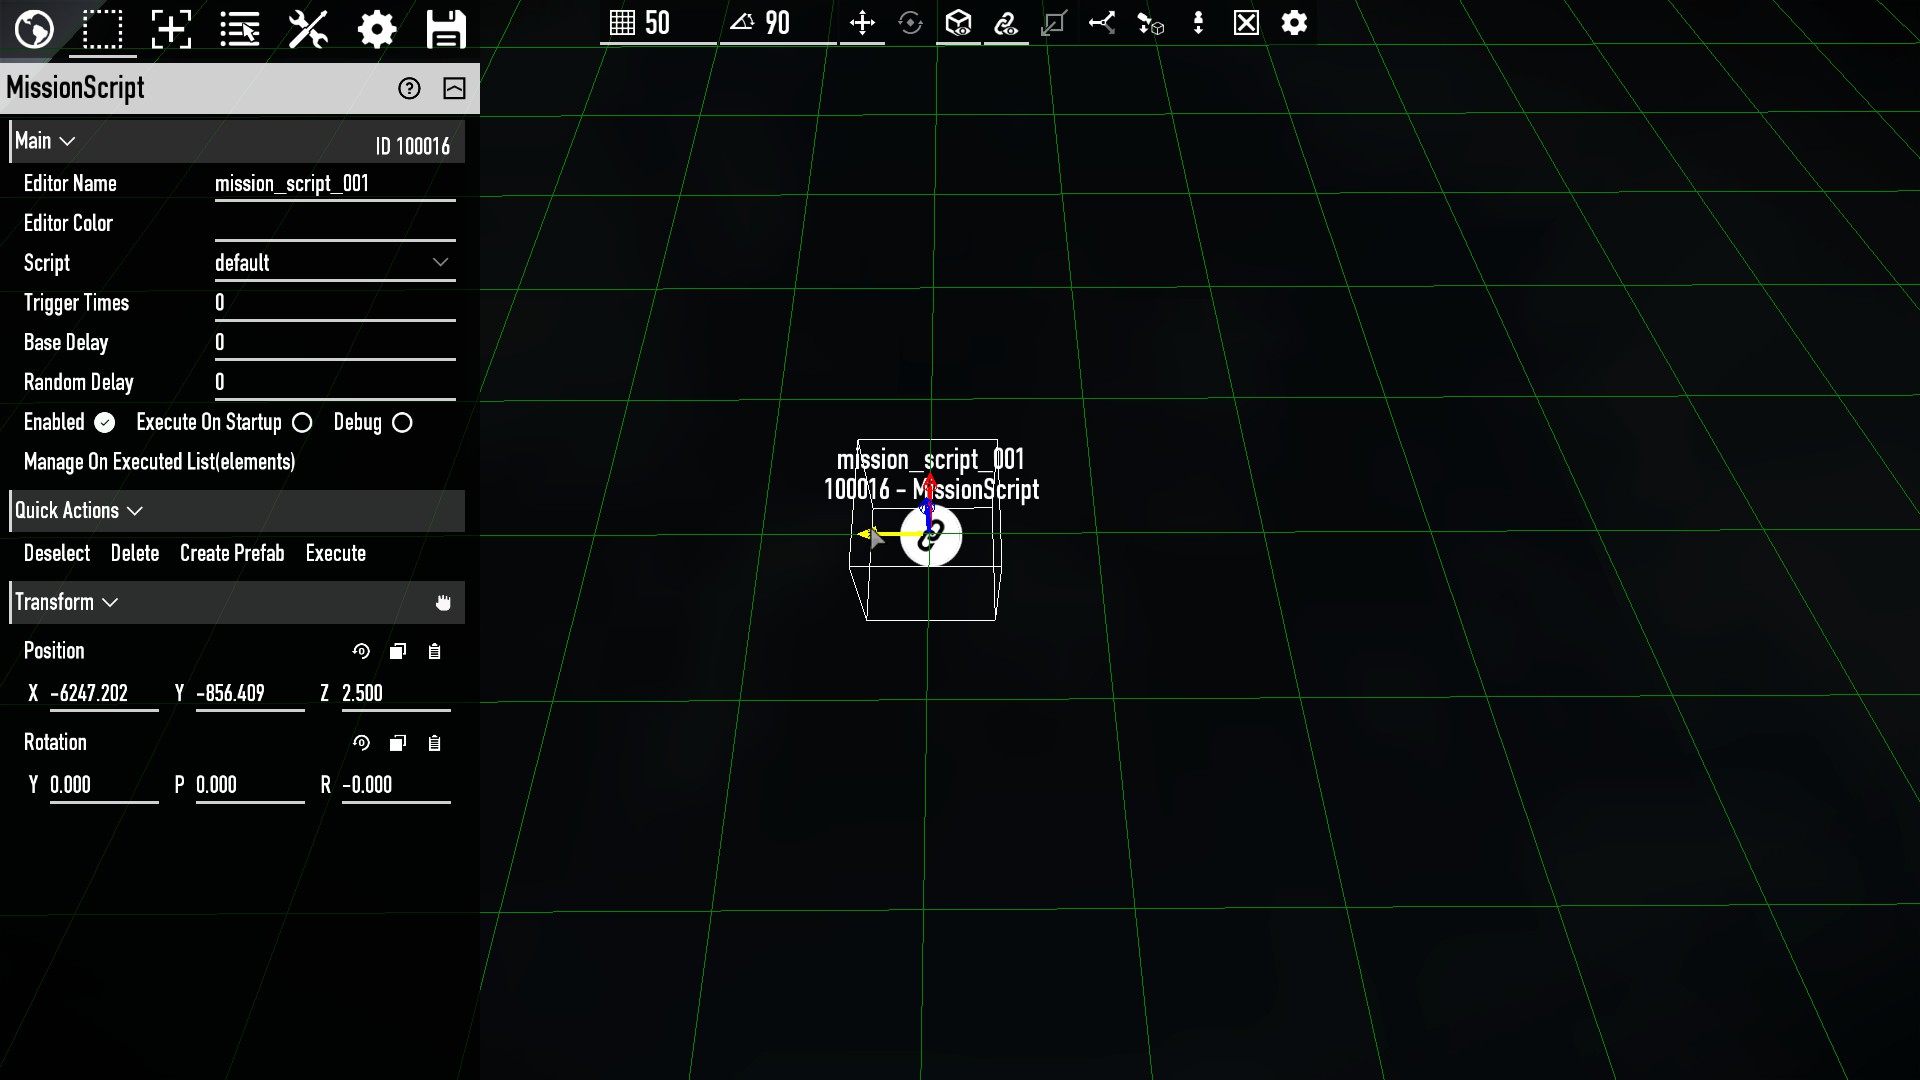
Selecting an element gives you the following options:
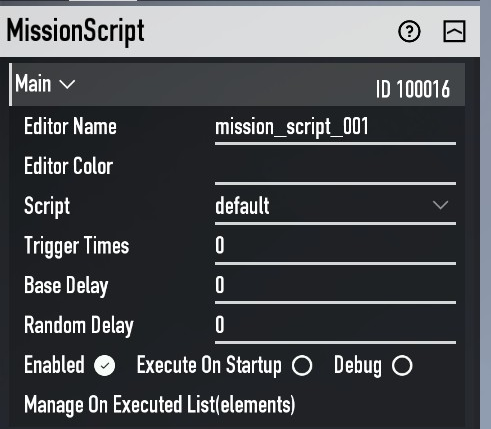
Editor Name Lets you give the element a custom nickname, so you can find it more easily when searching for it.
Editor Color Lets you give the element icon a custom color. This can help in organizing your script or visually highlight certain elements. Default colors for elements can also be defined in the BeardLib Editor Menu Options.
Script Lets you change what script the element belongs to.
Trigger Times Determines how many times the element can be executed. 0 means it can be executed an infinite amount of times. 1 means it will execute once and then disable itself.
Base Delay Adds a specified amount of time in seconds to the execute list and Random Delay adds additional time, randomized between 0 and the amount you specified.
Enabled Lets you enable and disable the element. Disabled elements cannot be executed and will not execute other elements. This state is saved, as it is important for scripting your level.
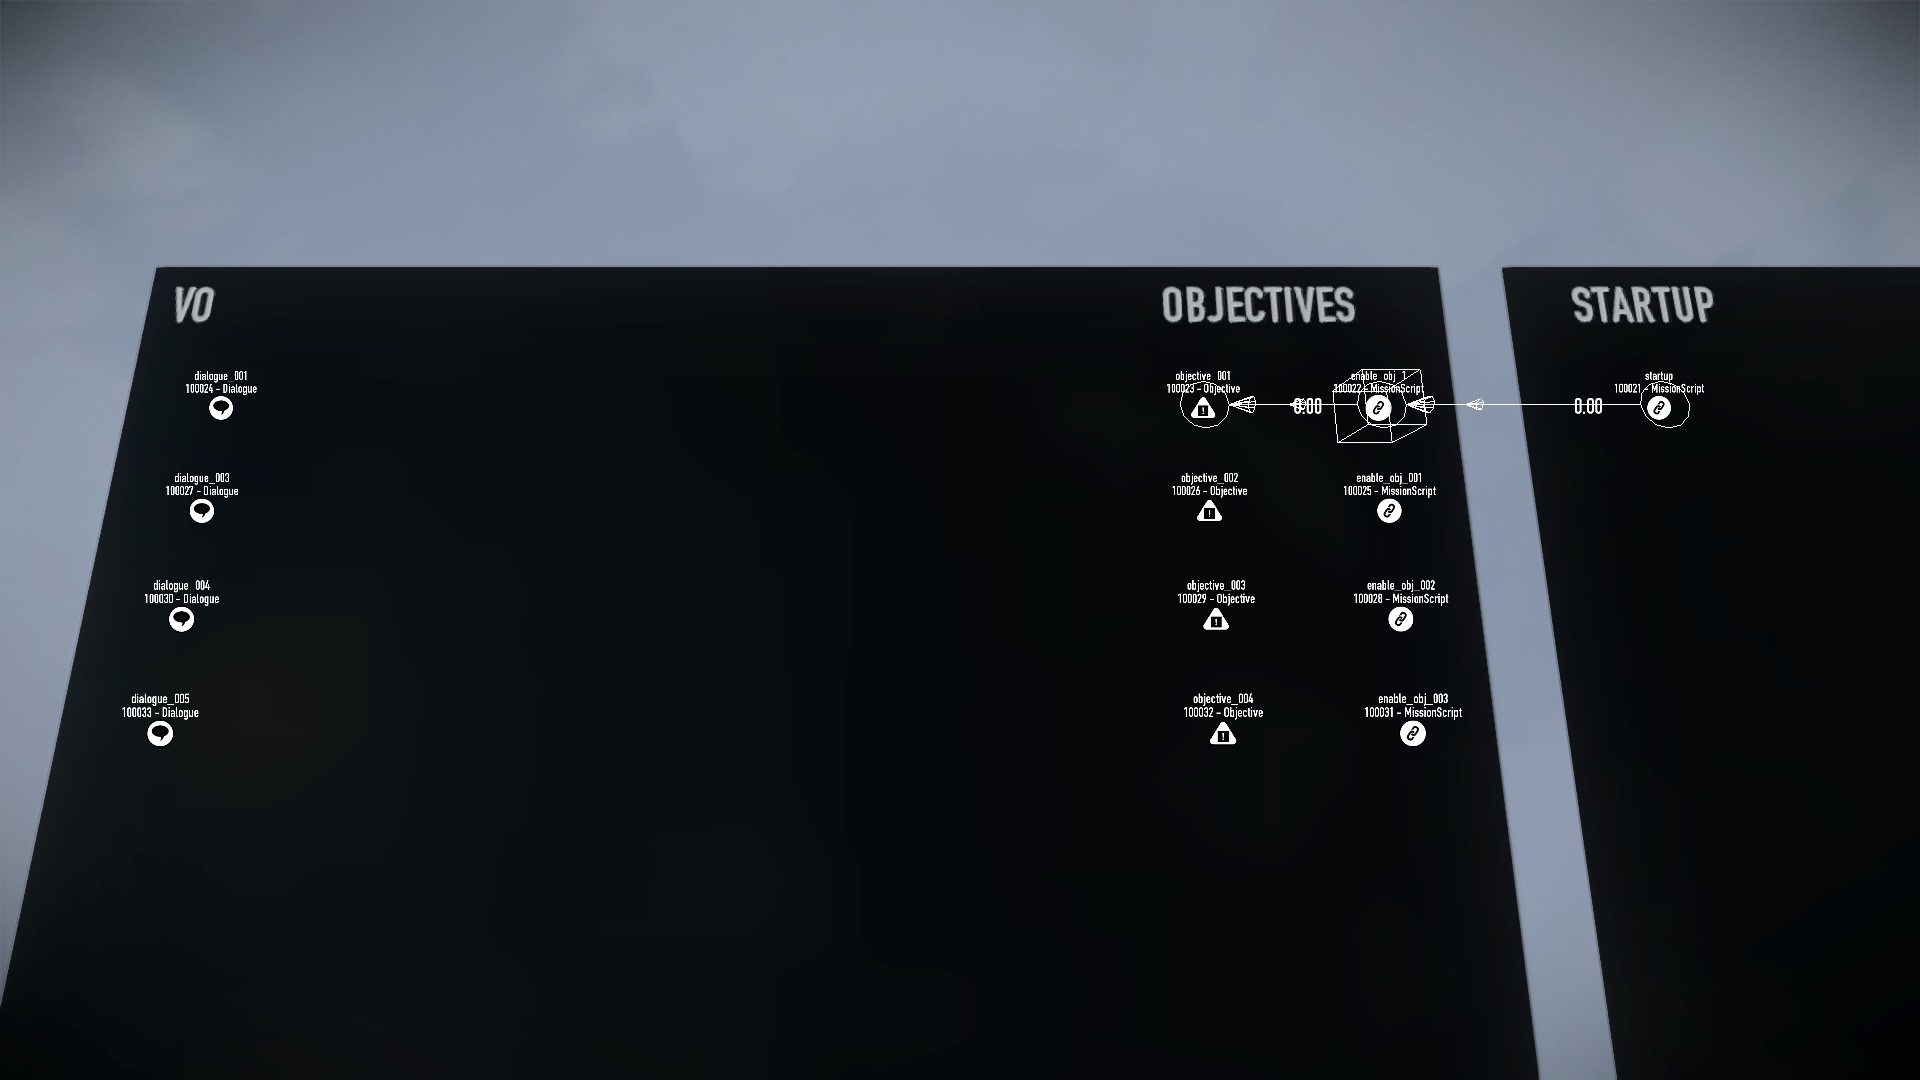
Execute On Startup Will execute the element as soon as the host has finished loading the level and entered the Loadout screen.
Debug Will give the element the debug flag, for the debug options in the Tools menu.
Manage On Executed Opens a list with all elements that get executed from this element. You can manually search for elements to add here, or add elements by holding CTRL and left clicking elements to execute. Be careful not to accidentally add an element to it's own "On Executed" list, as it will endlessly execute itself and likely cause a stack overflow crash. Use the "Element Loops" tool in the Debug tab of the Tools menu to check for element loops liek this.
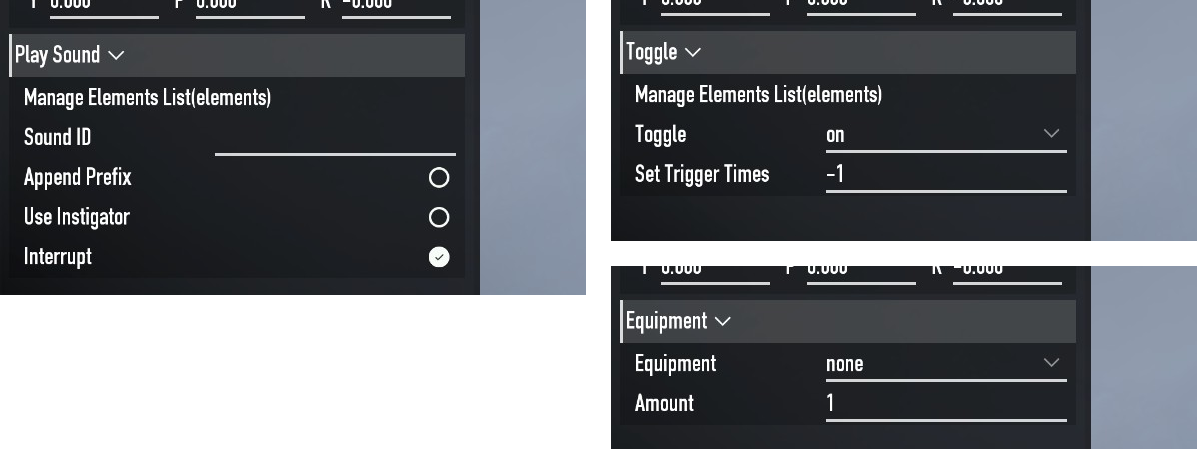
Each type of Element then has their own additional setting, depending on what it’s supposed to do.
Equipment for example will add a specified special equipment to the player’s inventory, PlaySound which plays a specified sound, or Toggle which can enable and disable other elements.
 These are just examples, there are way too many elements so listing them here would blow this part out of proportion.
-> Mission Elements Wiki Page
Some Elements require you to link to other elements or units to perform their task on them, like the Toggle, AIGraph or Operator elements. Instead of adding the targeted element or unit to the On Executed list, you have to put it in their own list in the element specific settings by opening it, or holding SPACEBAR while clicking other elements.
Startup
To start your script when you play the level, at least one element needs to have “Execute On Startup” enabled to trigger the script. This is usually a MissionScript Element. This however should only be used to enable your player spawns, prepare some level layout and set the Whisper State if needed. Since startup triggers as soon as the host enters the loadout screen. This could cause issues with timers, delays and likely desyncs with clients.
Your actual level logic should be triggered with an AreaTrigger so it only starts when all players are actually spawned in your level.
Organization
For organization purposes, your elements should be way above the play area of your level on black planes (units/test/jocke/plane_black_temp). Editable_text units can be used to further label your elements. The planes and the text should also be editor only. This is completely optional, but it massively helps keeping your script organized and readable.
Mission elements on the Dragon Heist. Placed way above the level to be out of the way, organized and labeled to be readable.

No comments to display
No comments to display