Legendary Armor Skins/LAS/MOOG/Outfit Module Guide
This guide as also made by Columbus, if you'd like to contact me on Discord, please join the modworkshop.net server and ping me if you have any questions in #payday2-modding.
Now to start...
Prerequisites:
-
Blender, you could either download it at Blender.org
-
You could also download Blender through Steam
-
For the version, I use 3.2.2, but you could also use 4.X.X
These are all the bare essentials you'll need to begin your path down modeling and porting models to PAYDAY 2.
Got them all downloaded and everything is running correctly? Good. Now, let's move on.
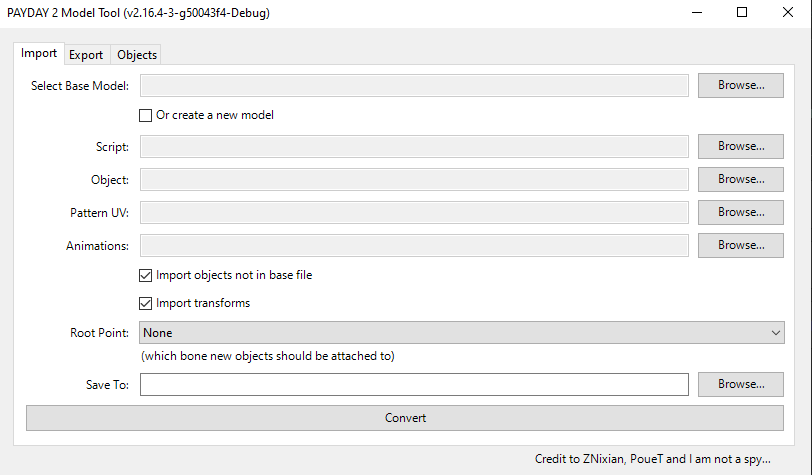
If this is your first time modding for PAYDAY 2, and you don't know what does what on the model tool, I'll explain a basic run down of each section, and tab.
-
For the import screen, this is where all the magic happens, The first section "Select Base Model" this is where you'll import the base model of what you're modifying.
-
The second section "Script" is what you'll be using the most (or least) to import your .glb file and have it be read by the model tool.
-
Object is the alternative to Script, where instead of using a script to import your model and have it be saved/converted into a .model, you'll just import the .glb file by itself with no .mscript file to assist you in doing so.
-
Pattern UV can be safely ignored since it is more suited for weapon modders, and that's what we're not here for.
-
Animations can also be safely ignored.
-
The check boxes, Importing objects not in base file, and Import transforms, it's best to always keep those two ticked on, no matter the circumstances.
-
"Save To: is where you wish to place your newly generated .model file in a folder.
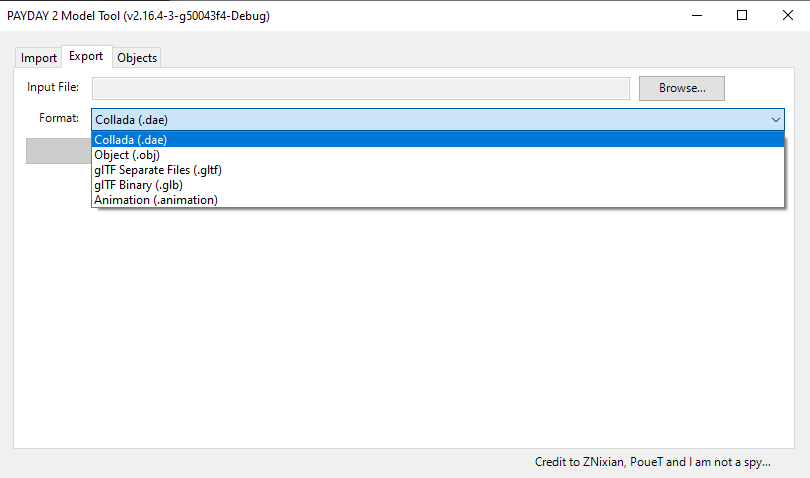
This is the export screen of the model tool, this is where you drag and drop your .model file and convert it to either a .dae .obj .gltf .glb or .animation

All I should say for this is that always keep your export format as a .glb format.
I will not go through a preview of the Objects tab since it is more meant for users who are more well-versed in model editing.
Now that we've gone through the basic rundown of the Model Tool, let's start to move into Blender. To export your first .model file, select the .model you want to export, I'll for example use Kento's model, located at "units\pd2_dlc_des\characters\civ_male_des" in the game files.
When you export the model to a .glb a new file should appear with the same name in a glb format. Open up blender, and at the left of the screen there should a piece of text called "File" click on it and a new menu should appear, and hover over import, it should look like this if you've done it correctly.
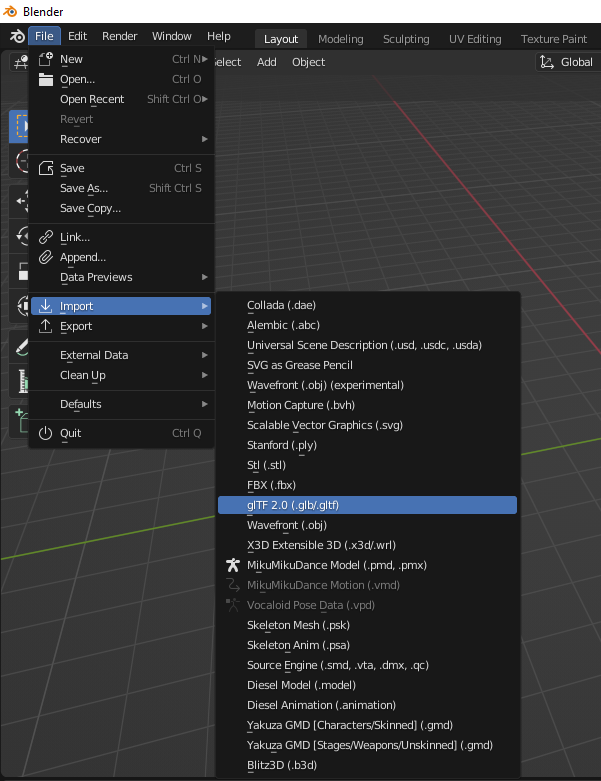
You're import file list won't be as big as mine since I have several plugins installed, but click the glTF 2.0 option and a new menu should appear.
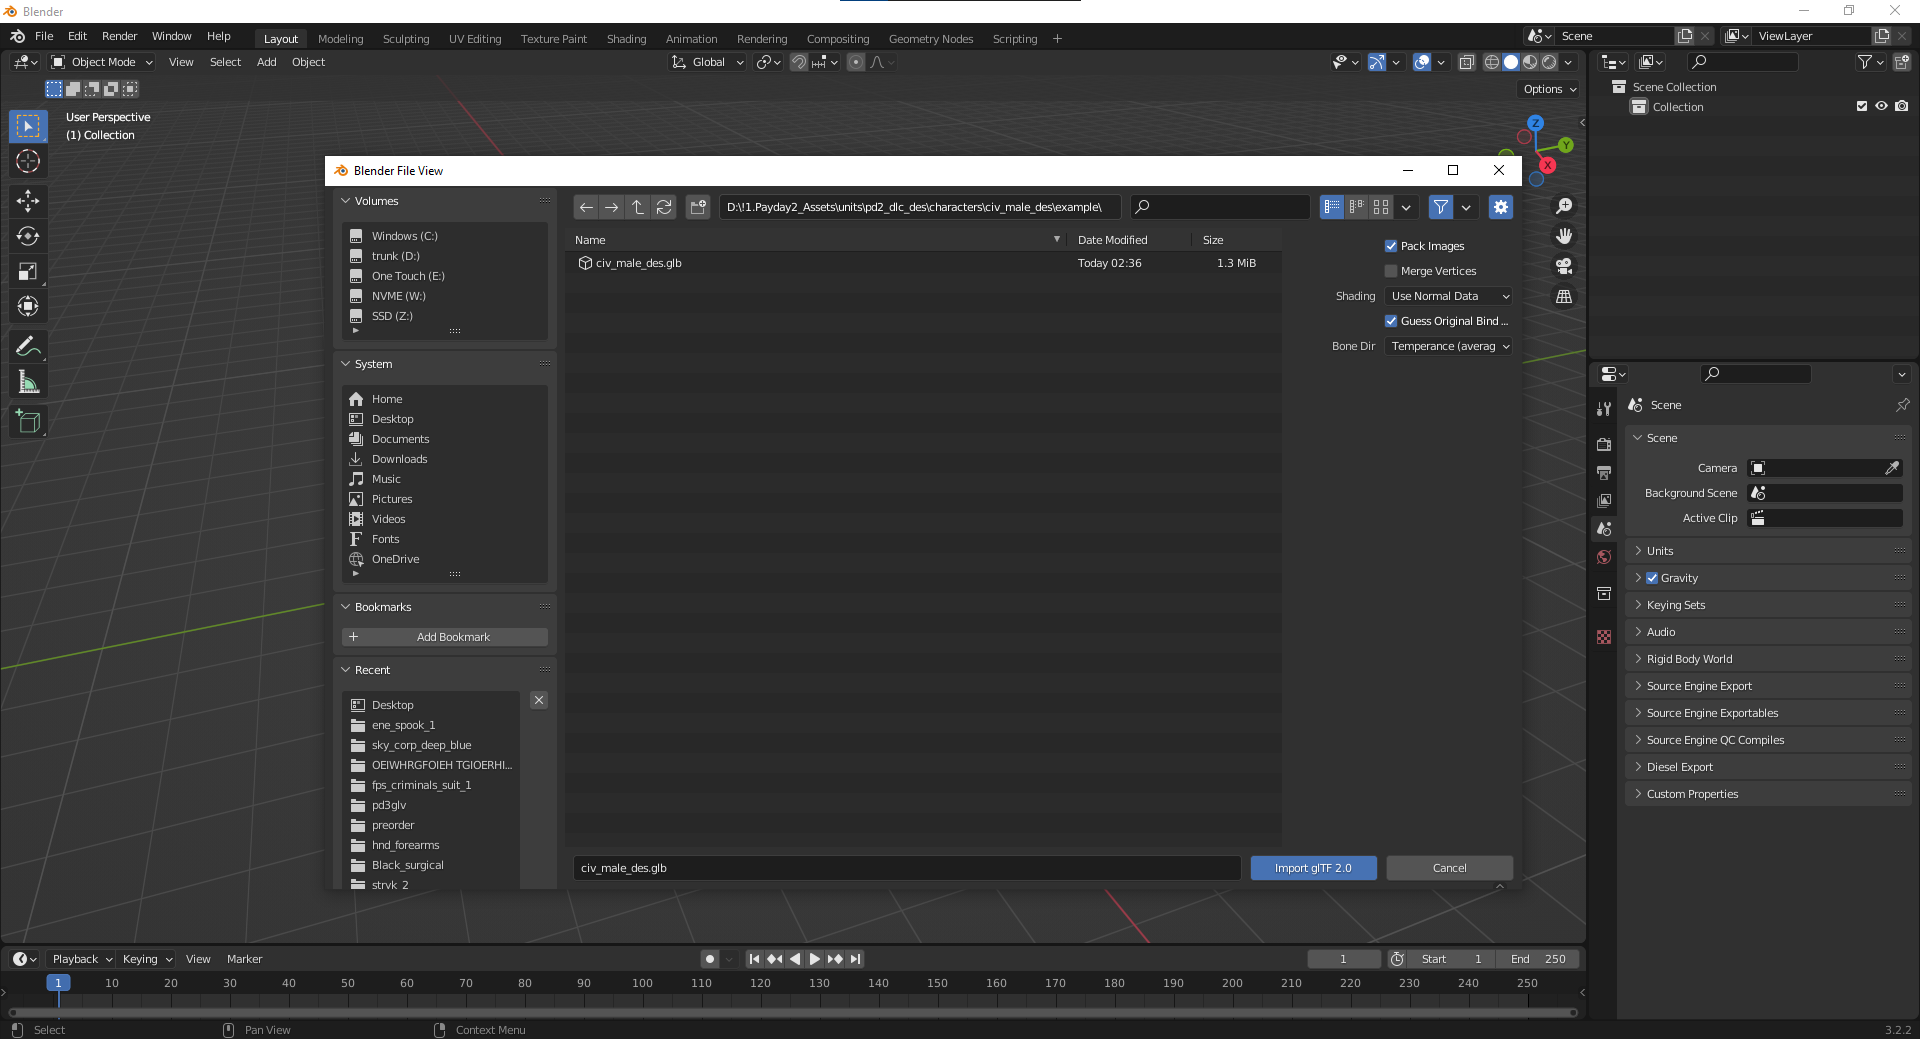
Right before you import, change the setting at the right side of the new window called Bone Dir, change it from Temperance to Blender, Blender 4.X has this option automatically selected.
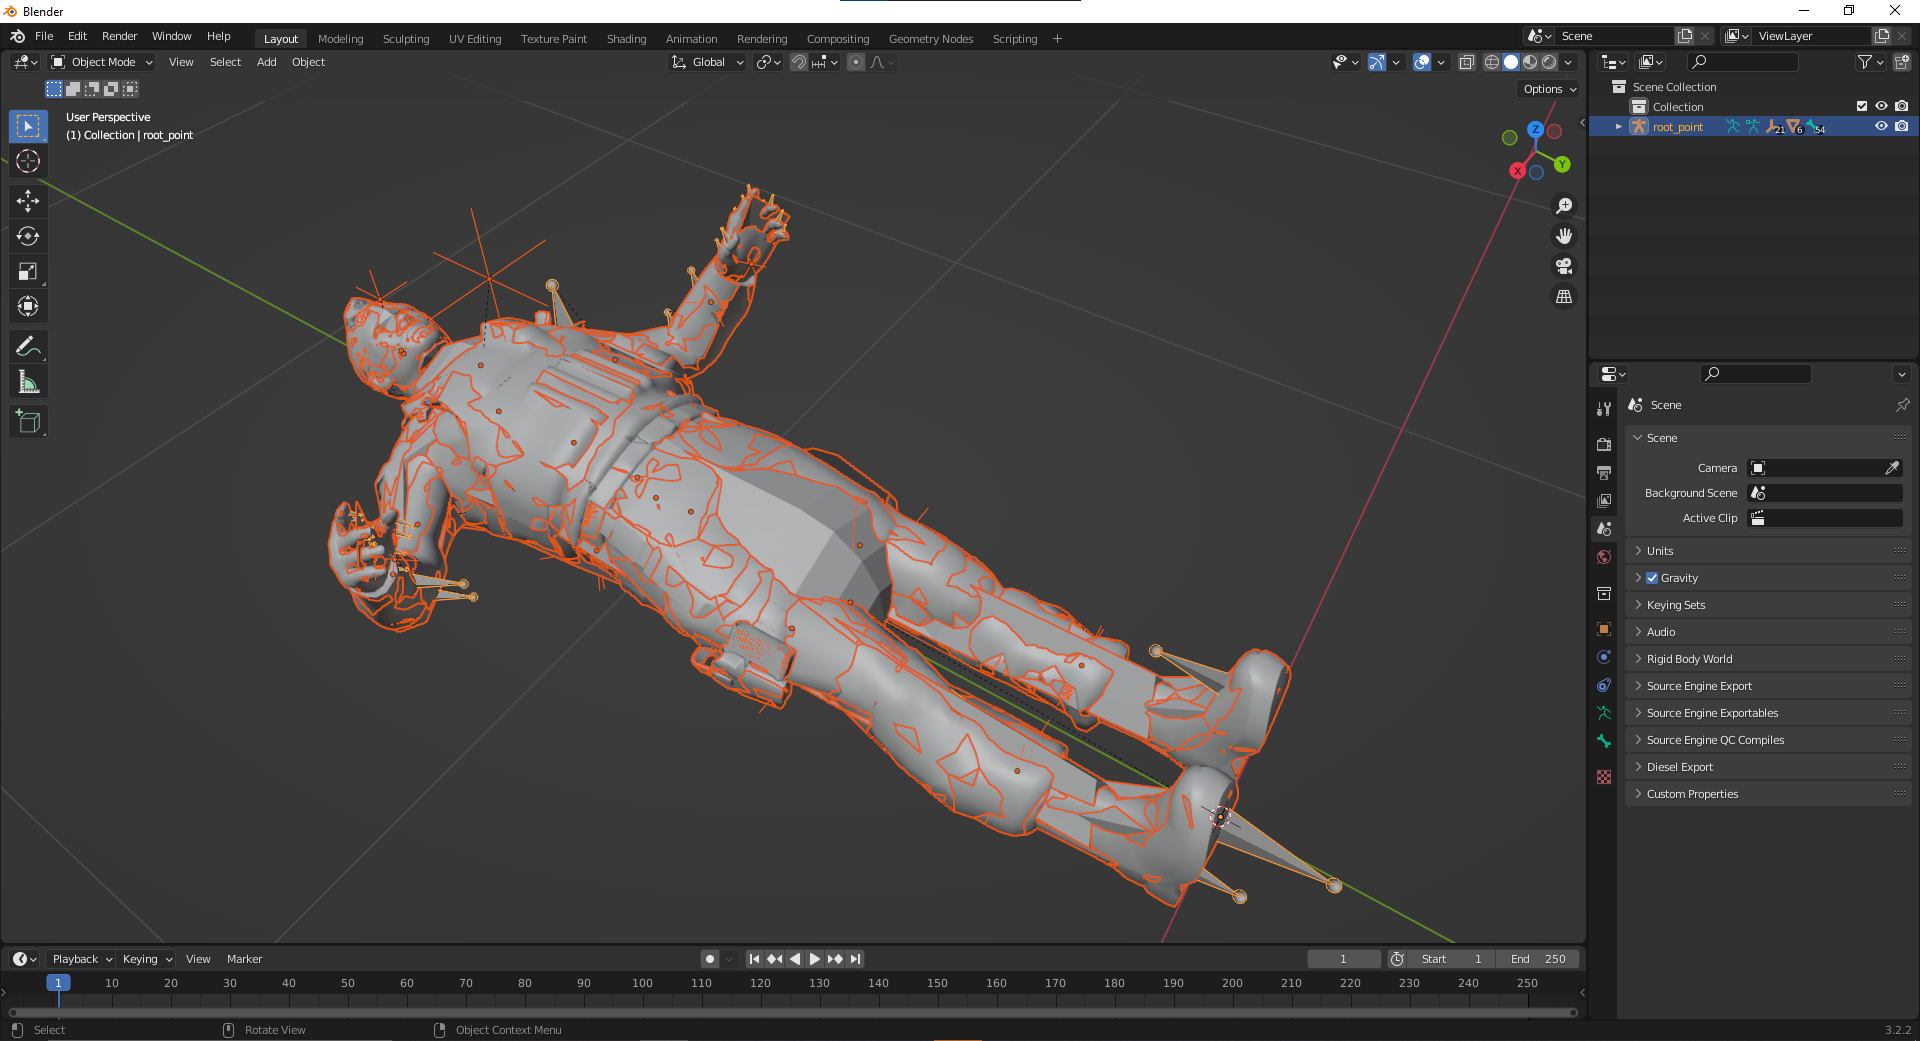
You've now imported your model that you'll be using as a base. Unfortunately if you're a new Blender user, this could be extremely complex at first, but if you're a experienced Blender user, new to PAYDAY 2 modding, this should be easy.
Now to begin, let me start off by saying that the model you want to insert must be in a humanoid shape or a human. Anything that involves animals that were meant to originally be a quadruped, will be impossible to import or to even look good.